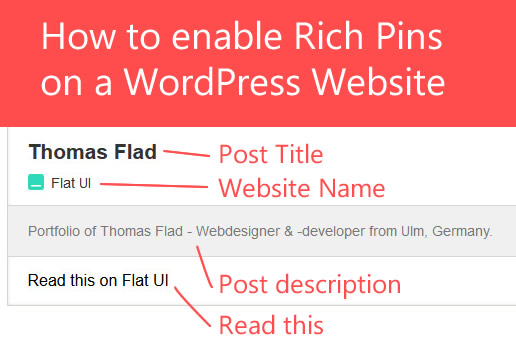
I noticed more and more of rich pins on the Pinterest website lately. What is a rich pin? Well, it basically provides more information about the website the pin content origination. For example, it will show helpful information with the pin, like a Favicon (the icon shown in your browser tab for a website), the author, the website name, and even recipe information if your article is recipe based. It looks really professional when you see the company name and icon next to it and makes the pin more likeable, or errr pinnable?
How to enable Rich Pins on your WordPress website
Pinterest has a developer section where you can test and validate rich pins. It can get a little confusing and complicated if you’re not a web developer. Even I had problems with it validating until I found out there’s an SEO plugin called by Yoast called the WordPress SEO Plugin. This only will work for a WordPress website, so only read on if your website is WordPress or you are planning on starting a website using WordPress.
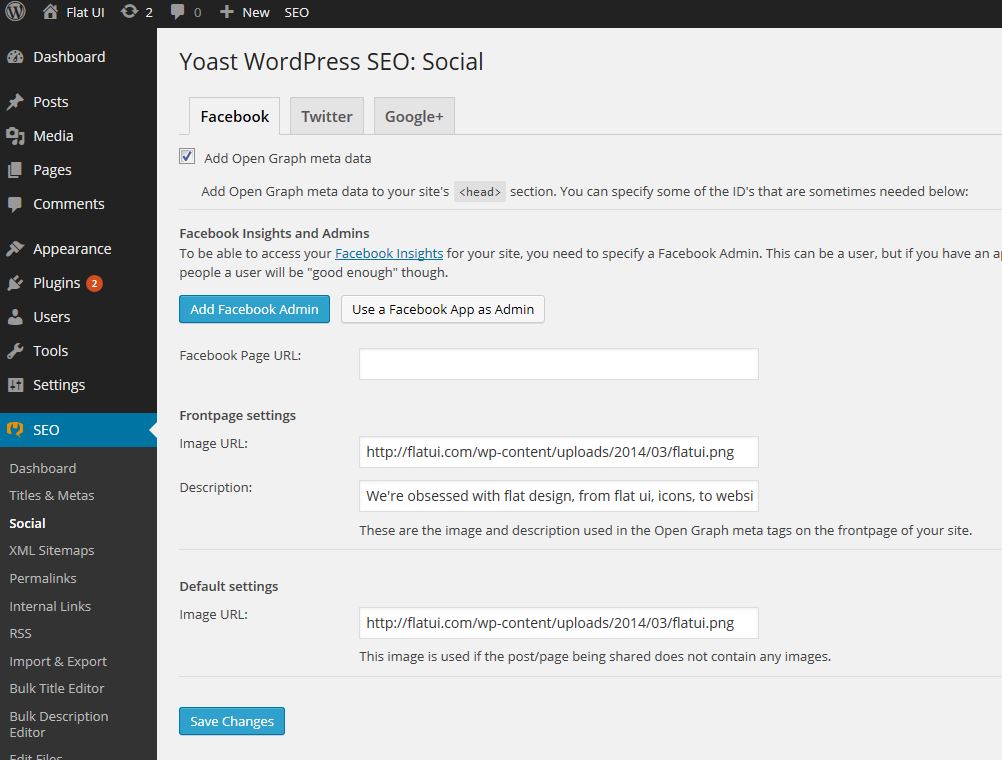
First thing’s first. Add the plugin via your WordPress control panel or download/upload it. Activate the plugin. Now Navigate to SEO > Social. Now simply enable “add open graph meta data”. This will add the open graph meta tags necessary for rich pins. Now add any other settings you wish to add below. It may be good to add your Facebook page URL. I added a front page image and description in case someone pinned my website’s homepage. It’s not necessary to validate your site with Pinterest rich pins, but I did it anyway.

Great, now head on over to Pinterest’s Rich Pin Validator. Copy and Past a page from your website into the validator and click “validate”. Now that your page is validated you can click “apply” so they can accept your rich pins. If something goes wrong they will email you.
Here’s my website validation:

